

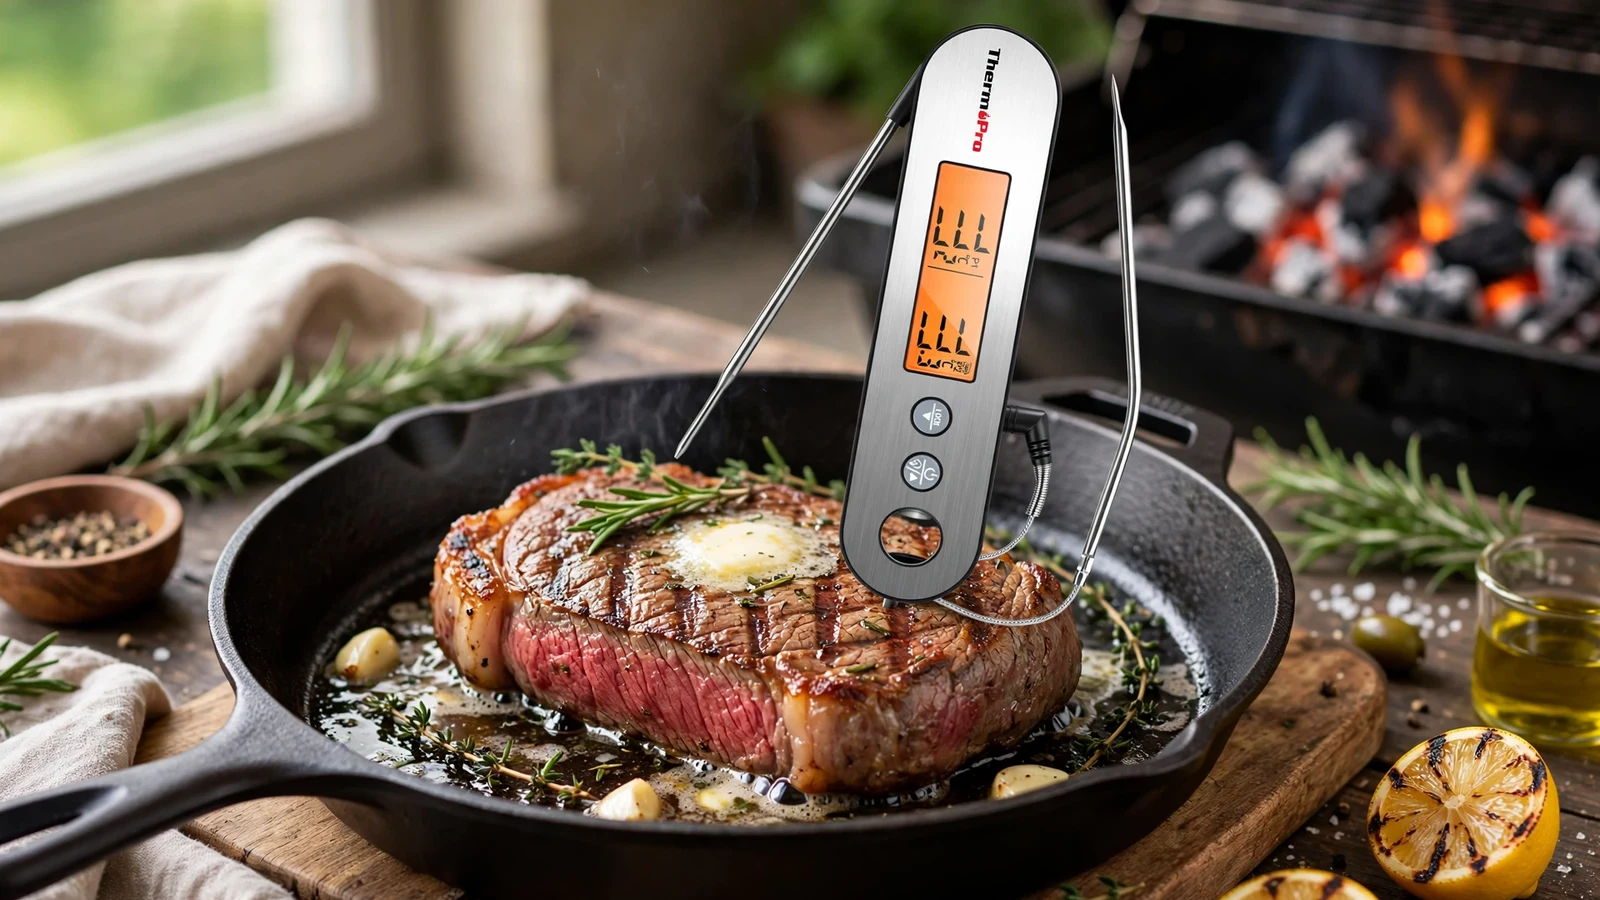
Seeing an unfamiliar code on your kitchen gadget can ruin cooking momentum, especially when you are trying to figure out what does lll mean on thermopro meat thermometer screens. This strange message usually pops up when the device detects something outside its normal operating limits, leaving your brisket or roast untracked until you fix it.
Understanding this error code helps you salvage your dinner and keeps your hardware working for years. Let’s break down why this happens and how to get your kitchen tools back on track.
Decoding the Low Temperature Warning
When you spot the LLL error code blinking on your screen, the device is telling you that the detected environment falls below its lowest measurable limit. ThermoPro meat thermometers rely on precision thermistors inside the metal tip to calculate heat levels. If the ambient air or the meat itself drops beneath the engineered threshold, the digital display simply cannot compute a proper number.
Most kitchen-grade digital tools are not built to measure cryogenic or extreme sub-zero conditions. If you pull a probe straight out of a deep freezer and power it on immediately in a cold room, you might trigger this exact warning.
The sensor is essentially saying it is too cold to read. This differs entirely from its counterpart, the HHH error, which pops up when things get dangerously hot.
Recognizing the difference between these two codes saves you from unnecessary panic during meal prep. While an upper-limit warning means danger of melting or sensor burnout, a lower-limit warning usually points to environmental factors or a loose connection. Let’s look closer at how the physical hardware interacts with these temperature boundaries.
Understanding ThermoPro Sensor Limitations
Every piece of cooking gear has an operating envelope, and thermometers are no exception. The typical range for a standard digital meat probe spans from freezing point up to about 572 degrees Fahrenheit or higher. Once you step outside that window, the circuitry fails to register valid data.
If you are testing ice water just to calibrate your gear, you should safely land right around thirty-two degrees. Drop below that threshold due to chemical additives or faulty calibration, and the screen might flash its warning lights. Manufacturers design these safeguards to protect the internal microchips from sending erratic data to the main unit.
Ignoring these boundaries can sometimes cause permanent calibration drift. Keeping your hardware within its designated temperature range ensures accurate readings every single time you cook. If you want to dive deeper into food safety standards and proper equipment usage, you can check out the USDA kitchen thermometer guide for official recommendations on safe cooking practices.
Investigating Faulty Probe Connections
A loose plug is often the silent culprit behind a strange screen readout. When the metal jack isn’t pushed all the way into the transmitter base, the circuit remains incomplete. This interruption mimics a sensor failure, forcing the unit to display an error code.
Take a close look at where the wire plugs into the digital base. Push the connector firmly until you feel a distinct click. Many users think it is plugged in because the metal tip is partially inside, but a fraction of a millimeter can break the electrical signal.
Here is a quick checklist to verify your hardware setup:
- Inspect the entire length of the stainless steel cable for kinks or bite marks.
- Ensure the audio jack is fully inserted into the receiver port.
- Check the battery compartment for corrosion or loose AAA cells.
- Wipe the metal probe tip with a damp cloth to clear away old grease.
If you notice any fraying on the wire mesh, the internal wiring might be severed. A broken wire will permanently throw an error code because the electrical current cannot complete its loop.
Troubleshooting Damaged Probe Wires
Kitchen environments are tough on electronics, and thin metal wires take a lot of abuse. Slamming a smoker lid down on a cable or accidentally melting the silicone coating on a burner will ruin the sensor instantly. Once the internal filament snaps, the unit treats it as an open circuit.
Damaged gear usually gives erratic readings before failing completely. You might see numbers jumping wildly from room temperature up to maximum limits before settling on the dreaded error code. At that stage, simple fixes won’t work anymore.
You can test if the probe itself is dead by swapping it with a second channel if your model has multiple ports. If the error moves to the new port, the wire is fine. If the error stays on the original port, the issue lies within the base unit or the connection slot.
Performing a Proper System Reset
Sometimes the digital brain inside your cooking gadget just needs a fresh start. Glitches in the firmware can cause the screen to lock up and display warning codes indefinitely. Resetting the device clears out temporary memory bugs and forces a fresh hardware check.
To execute a proper power cycle, pop out the batteries from both the transmitter and the receiver units. Leave them powered down for at least sixty seconds to let all residual electrical charge drain from the capacitors. Pop fresh batteries back in, making sure the polarity matches the diagram inside the housing.
Some models feature a dedicated sync button that you need to hold down to re-establish wireless pairing. Check your specific manual for exact pairing sequences, as older models differ slightly from modern touch-screen variants. Once reset, the screen should display ambient room stats normally.
Comparing Common Error Codes
To help you quickly diagnose what your screen is trying to tell you, keep this quick reference table handy while you are cooking.
| Error Code | Primary Meaning | Common Cause | Recommended Action |
|---|---|---|---|
| LLL | Low Temperature | Probe below range or loose plug | Warm up probe and check connection |
| HHH | High Temperature | Sensor exposed to direct open flame | Move away from heat source immediately |
| Err | Hardware Failure | Short circuit or moisture damage | Replace the damaged probe accessory |
Referencing this chart during a grilling emergency prevents second-guessing. Knowing the exact boundary markers lets you take swift action before your dinner suffers.
When to Replace Your Equipment
Electronics do not last forever, especially when subjected to hundreds of degrees of heat on a weekly basis. Over time, the internal sensors degrade, leading to persistent error messages that no reset procedure can fix. Recognizing when your gear has reached the end of its lifespan saves you from ruined meals.
If you have tried cleaning the jack, swapping the batteries, and testing multiple ports with zero success, the hardware is likely shot. Replacement probes are widely available online and cost a fraction of a brand-new base unit. Buying a fresh sensor is usually all it takes to revive your setup.
Treating your gear with care extends its functional life significantly. Always let the metal cool down naturally before washing it, and never submerge the wired jack in standing dishwater.
Frequently Asked Questions
How do you fix a lll on a thermometer?
To fix this error, unplug the metal probe and plug it back in firmly to ensure a solid connection. Warm the sensor tip in your hand to see if room temperature registers, and replace the batteries if the problem persists.
Why is my ThermoPro reading lll?
This reading indicates the sensor is detecting temperatures below its minimum operating limit, or the probe wire has suffered internal damage. It can also happen if the audio jack is not pushed all the way into the transmitter base.
How do I reset a ThermoPro thermometer?
Remove the batteries from both the transmitter and receiver units for one minute. Reinsert fresh batteries, ensure proper wireless synchronization, and check if the normal ambient display returns.
Can a damaged probe cause this error?
Yes, a severed internal wire or water damage inside the metal tip will permanently trigger error codes. If swapping the probe to a different port does not resolve the issue, you will need a replacement accessory.
Conclusion
Dealing with unexpected error codes on your kitchen gear can be frustrating when you are right in the middle of preparing a meal. Now that you know why this warning appears, you can quickly check your connections, test your battery power, and get back to monitoring your food. Keep your hardware clean, respect its operational limits, and enjoy stress-free cooking every time you fire up the grill.