


Getting the exact internal temperature of a holiday centerpiece can feel stressful, but learning where to insert a meat thermometer in ham takes the guesswork out of baking. Nobody wants to slice into a dry, overcooked roast after hours in the oven, nor do they want to risk serving undercooked pork to guests. Proper placement ensures accurate readings every time you cook.
Understanding Ham Anatomy and Internal Temperatures
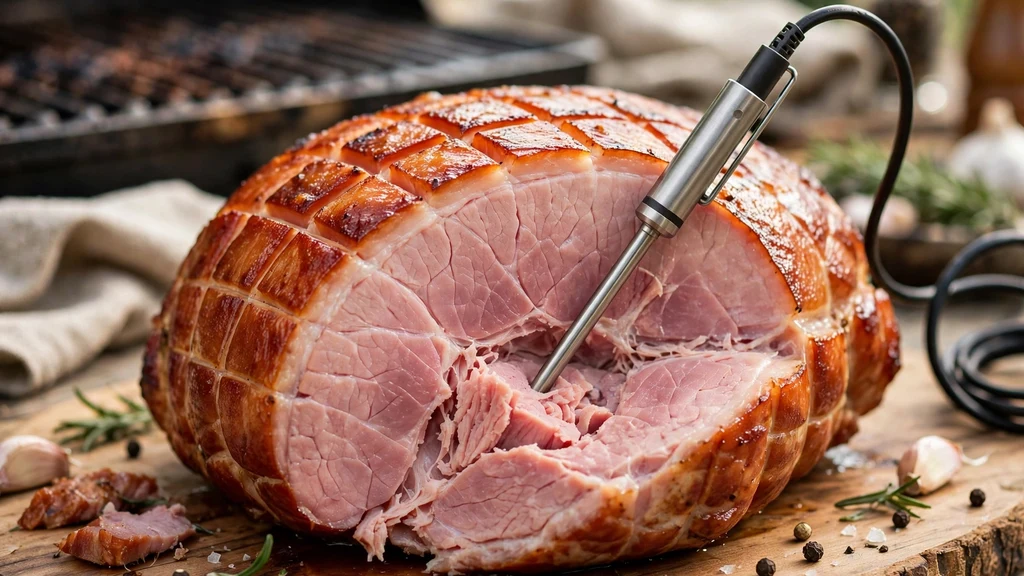
Knowing the structure of your roast determines the correct placement of your cooking probe. Hams generally come in two distinct styles: bone-in and boneless. Each variety requires a slightly different approach when you test temperature to make sure your meal turns out safe and delicious.
For a fully cooked spiral-sliced ham, you are primarily reheating the meat rather than cooking it from raw. The target internal temperature for these varieties sits around 140 degrees Fahrenheit. Uncooked or fresh hams require a higher reading of 160 degrees Fahrenheit to ensure safety.
Bone-in cuts hold heat differently than boneless versions. The dense bone conducts heat faster than the surrounding muscle tissue, which can throw off your readings if your probe gets too close. Understanding this thermal behavior helps you find the coolest part of the roast for an accurate reading.
Finding the Deepest Part of the Meat
The thickest section of the roast holds the most thermal mass and takes the longest to heat through. When you insert a digital probe, aim directly for this dense center meat rather than the edges. Hams taper at the ends, so poking a thin side piece will only tell you how hot the surface is while the core remains cold.
Slide the tip of your thermometer into the meatiest portion of the cut. Push it in slowly until you feel the point reach the middle. If you push all the way through to the other side, pull it back slightly until the sensor rests dead center.
Visualizing the geometry of the roast helps tremendously. A whole shank or butt portion has a distinct shape with thick muscles surrounding a central cavity. Target the meatiest bulge of that muscle group for your primary reading.
Avoiding the Bone Trap
Touching the bone with your thermometer tip will give you a falsely high temperature reading. Bones conduct heat much faster than muscle tissue, meaning your gauge might read 145 degrees while the surrounding meat is still lagging behind at 120 degrees.
Always keep the probe away from any structural bone inside the roast. If you accidentally hit the bone, pull the probe back a fraction of an inch and angle it slightly away.
* Slide the probe in at an angle rather than straight down to bypass surface fat and avoid bone.
* Double-check your depth if the reading spikes unusually fast after only a few minutes in the oven.
* Feel for the solid resistance of the bone as you push the probe in, then back off immediately.
Leave-In Probes Versus Instant-Read Thermometers
Different styles of thermometers require different handling during the cooking process. A leave-in probe thermometer stays inside the roast throughout the entire baking cycle, allowing you to monitor rising temperatures on an external digital display without opening the oven door.
Instant-read thermometers work best as a spot-check tool near the end of your estimated cooking time. You open the oven, insert the metal stem for a few seconds, and remove it immediately.
| Thermometer Type | Best Use Case | Placement Strategy |
|---|---|---|
| Leave-In Probe | Continuous monitoring | Inserted before baking, remains in place |
| Instant-Read | Spot-checking near the end | Inserted 15 minutes before expected finish |
| Dial Thermometer | General temperature checks | Slower response, requires deep insertion |
Both styles work effectively if you follow proper insertion depth guidelines. Leave-in digital models offer superior convenience because you never have to guess when to check your roast.
Step-by-Step Insertion Technique
Executing the physical placement requires a steady hand and a clear view of your roast. Take your time positioning the device so you don’t damage the skin or decorative glaze on the outer surface.
Start by clearing away any heavy glaze or fruit studs in your chosen insertion zone. Glazes can insulate the meat or gunk up the sensor, leading to erratic readings.
1. Remove the ham from the oven or grill and place it on a stable prep surface if you are using an instant-read model.
2. Locate the thickest muscle mass on the roast, making sure it is well away from any visible bone structure.
3.
Push the metal probe into the center meat, ensuring the sensing portion (usually marked by a dimple on digital probes) is fully embedded.
4. Wait approximately 15 to 30 seconds for the display to stabilize before recording your final measurement.
Accounting for Glazes and Surface Fat
Heavy sugar-based glazes can create a micro-climate of intense heat right on the surface of your roast. If your thermometer touches a thick pool of caramelized brown sugar or honey on the outer layer, the display will reflect the temperature of the glaze rather than the meat underneath.
Fat caps also skew readings slightly, though not as drastically as direct bone contact. Try to pass through the fat layer quickly so the active tip resides purely inside the muscle tissue.
For expert tips on food safety and precise temperature guidelines, check out the USDA Food Safety and Inspection Service for official recommendations on pork preparation. Following these standards keeps your family safe while delivering a mouthwatering meal.
Allowing the Ham to Rest After Cooking
Pulling your roast from the heat source is only half the battle. You must let ham rest for 15 to 20 minutes before carving to allow the internal juices to redistribute evenly throughout the muscle fibers.
If you slice immediately after it comes out of the oven, all those flavorful juices will run out onto your cutting board, leaving the meat dry and stringy. Leaving the probe in for the first few minutes of the rest period can help you monitor cooling, though most cooks remove it right away.
During this resting period, the residual heat will cause the internal temperature to rise slightly by a few degrees. Factor this carryover cooking into your timing so you remove the roast just before it hits its final target.
Common Thermometer Mistakes to Avoid
Even experienced home cooks occasionally make simple errors that ruin a holiday dinner. Placing the probe too close to a fat pocket or angling it so it pokes out the bottom of the roast will yield inaccurate data.
Another frequent mistake involves failing to calibrate your thermometer before use. Test your device in boiling water (which should read 212 degrees Fahrenheit at sea level) or ice water (32 degrees Fahrenheit) once a year to ensure your readings are precise.
Finally, never leave plastic or non-heat-resistant thermometer components inside a hot oven or grill. Only dedicated oven-safe probe wires and stainless steel stems should ever enter a hot cooking chamber.
Frequently Asked Questions
Where should you check the temperature of a ham?
You should check the temperature in the thickest part of the meat, making sure the probe reaches the center without touching any bone, fat pockets, or the outer glaze layer for an accurate reading.
Does a ham have to be cooked to 140 degrees?
Fully cooked commercial hams only need to reach 140 degrees Fahrenheit to be safely reheated. Uncooked or fresh country hams must reach an internal temperature of 160 degrees Fahrenheit to ensure proper food safety.
Can I leave a meat thermometer in the meat while it’s cooking?
You can leave specialized oven-safe probe thermometers in the meat throughout the entire cooking process. Standard instant-read models should never stay in the oven because their plastic and electronic components will melt or fail under high heat.
How far should I insert a meat thermometer into the meat?
You should insert the thermometer about two inches deep into the thickest section of the roast, ensuring the sensitive tip rests directly in the center of the meat without poking out the other side.
Conclusion
Mastering proper thermometer placement transforms holiday cooking from a guessing game into a reliable science. By targeting the thickest muscle mass, avoiding bones, and respecting resting times, you ensure a juicy, perfectly cooked centerpiece every single time. Enjoy preparing your next roast and sharing a wonderful meal with your family.